Saturday, 22 April 2017

Benchmark memcached vs memcache vs redis

My setup:
Fedora 25,Nginx 1.10.2,redis 3.1.2,memcache 3.0.9,memcached 3.0.3,php-fpm 7.0.17.

My Benchmark script(php)
<?php
################# memcached ###################################################
    
    $k=0;
    $t_time=0;
    echo "
Benchmark memcached :
"; $memcached = new Memcached; $memcached->addServer("127.0.0.1", 11211)or die ("Cannot connect"); $original_string = 'abcdefghijklmnopqrstuvwxyz'; for ($i=0;$i<=10000;$i++){ $random_string = get_random_string($original_string, 10); $random_string2 = get_random_string($original_string, 10); $a1[$i]=$random_string; $a2[$random_string]=$random_string2; } $tstart=timer_start(); for ($i=0;$i<=10000;$i++){ $memcached->set($a1[$i], $a2[$a1[$i]],20) or die ("Cannot save data"); } $t_time=timer_end($tstart); echo "Total Set time: ".$t_time."
"; for ($j=0;$j<10;$j++){ $tstart=timer_start(); for ($i=0;$i<=10000;$i++){ $value = $memcached->get($a1[$i]); } $t_time=timer_end($tstart); echo "Loop $j (Get) time: ".$t_time."
"; $k=$k+$t_time; } echo "Total 10 loop Get time $k
"; ################# memcache ################################################### $k=0; $t_time=0; echo "
Benchmark memcache :
"; $memcache = new Memcache; $memcache->connect('127.0.0.1', 11211) or die ("Cannot connect"); $original_string = 'abcdefghijklmnopqrstuvwxyz'; for ($i=0;$i<=10000;$i++){ $random_string = get_random_string($original_string, 10); $random_string2 = get_random_string($original_string, 10); $a1[$i]=$random_string; $a2[$random_string]=$random_string2; } $tstart=timer_start(); for ($i=0;$i<=10000;$i++){ $memcache->set($a1[$i], $a2[$a1[$i]], false, 20) or die ("Cannot save data"); } $t_time=timer_end($tstart); echo "Total Set time: ".$t_time."
"; for ($j=0;$j<10;$j++){ $tstart=timer_start(); for ($i=0;$i<=10000;$i++){ $value = $memcache->get($a1[$i]); } $t_time=timer_end($tstart); echo "Loop $j (Get) time: ".$t_time."
"; $k=$k+$t_time; } echo "Total 10 loop Get time $k
"; ################# redis ################################################### $k=0; $t_time=0; echo "
Benchmark redis :
"; $redis = new Redis(); $redis->connect('127.0.0.1', 6379); $original_string = 'abcdefghijklmnopqrstuvwxyz'; for ($i=0;$i<=10000;$i++){ $random_string = get_random_string($original_string, 10); $random_string2 = get_random_string($original_string, 10); $a1[$i]=$random_string; $a2[$random_string]=$random_string2; } $tstart=timer_start(); for ($i=0;$i<=10000;$i++){ $redis -> set($a1[$i],$a2[$a1[$i]]); } $t_time=timer_end($tstart); echo "Total Set time: ".$t_time."
"; for ($j=0;$j<10;$j++){ $tstart=timer_start(); for ($i=0;$i<=10000;$i++){ $value=$redis -> get($a1[$i]); } $t_time=timer_end($tstart); echo "Loop $j (Get) time: ".$t_time."
"; $k=$k+$t_time; } echo "Total 10 loop Get time $k
"; function timer_start() { $time = microtime(); $time = explode(" ", $time); $time = $time[1] + $time[0]; return $time; } function timer_end($start) { $time = microtime(); $time = explode(" ", $time); $time = $time[1] + $time[0]; return $time-$start; } function get_random_string($valid_chars, $length) { // start with an empty random string $random_string = ""; // count the number of chars in the valid chars string so we know how many choices we have $num_valid_chars = strlen($valid_chars); // repeat the steps until we've created a string of the right length for ($i = 0; $i < $length; $i++) { // pick a random number from 1 up to the number of valid chars $random_pick = mt_rand(1, $num_valid_chars); // take the random character out of the string of valid chars // subtract 1 from $random_pick because strings are indexed starting at 0, and we started picking at 1 $random_char = $valid_chars[$random_pick-1]; // add the randomly-chosen char onto the end of our string so far $random_string .= $random_char; } // return our finished random string return $random_string; } ?>
Benchmark memcached : 
Total Set time: 0.69209885597229
Loop 0 (Get) time: 0.68401622772217
Loop 1 (Get) time: 0.67029213905334
Loop 2 (Get) time: 0.77216291427612
Loop 3 (Get) time: 0.68823003768921
Loop 4 (Get) time: 0.68713402748108
Loop 5 (Get) time: 0.66251420974731
Loop 6 (Get) time: 0.66882991790771
Loop 7 (Get) time: 0.63542795181274
Loop 8 (Get) time: 0.66616487503052
Loop 9 (Get) time: 0.66425609588623
Total 10 loop Get time 6.7990283966064 

Benchmark memcache : 
Total Set time: 0.72946310043335
Loop 0 (Get) time: 0.55730509757996
Loop 1 (Get) time: 0.46489191055298
Loop 2 (Get) time: 0.68988108634949
Loop 3 (Get) time: 0.73450708389282
Loop 4 (Get) time: 0.68325591087341
Loop 5 (Get) time: 0.67392992973328
Loop 6 (Get) time: 0.7195930480957
Loop 7 (Get) time: 0.74770784378052
Loop 8 (Get) time: 0.70041298866272
Loop 9 (Get) time: 0.70169019699097
Total 10 loop Get time 6.6731750965118 

Benchmark redis : 
Total Set time: 0.69859886169434
Loop 0 (Get) time: 0.69667816162109
Loop 1 (Get) time: 0.65093517303467
Loop 2 (Get) time: 0.68474006652832
Loop 3 (Get) time: 0.7402458190918
Loop 4 (Get) time: 0.6503758430481
Loop 5 (Get) time: 0.66205310821533
Loop 6 (Get) time: 0.70370101928711
Loop 7 (Get) time: 0.646409034729
Loop 8 (Get) time: 0.66896295547485
Loop 9 (Get) time: 0.67996406555176
Total 10 loop Get time 6.784065246582 
The results shows for simple Set and Get,memcached is quite comparable to redis.
And the result is not repeatable. Different results occurrs at different run.

For other functions,more extensive tests/benchmarks have to perform on both.

Tuesday, 29 September 2015

Backup MariaDB using xtrabackup on CentOS7

Percona XtraBackup is an open-source hot backup utility for MariaDB/MySQL-based servers that doesn’t lock your database during the backup. It can back up data from InnoDB, XtraDB, and MyISAM tables on MariaDB/MySQL servers.
This guide looks into how to setup xtrabackup backup system for MariaDB on CentOS7, and how to full backup an MariaDB, and then restore the DB.

First thing, ensure the minimum setup for database config file:
[root@centos7 ~]# vi /etc/my.cnf
#
# This group is read both both by the client and the server
# use it for options that affect everything
#
[client-server]

#
# This group is read by the server
#
[mysqld]
# Disabling symbolic-links is recommended to prevent assorted security risks
symbolic-links=0

#
# include all files from the config directory
#
!includedir /etc/my.cnf.d
[root@centos7 ~]# vi /etc/my.cnf.d/server.cnf
[mysqld]
datadir=/var/lib/mysql
socket=/var/lib/mysql/mysql.sock
log-error=/var/log/mariadb/mariadb.log
pid-file=/var/run/mariadb/mariadb.pid
Start MariaDB/Mysql
[root@centos7 ~]# service mysql start
Install percona repository, and install xtrabackup
[root@centos7 ~]# yum install https://www.percona.com/redir/downloads/percona-release/redhat/latest/percona-release-0.1-3.noarch.rpm
[root@centos7 ~]# yum list|grep percona
[root@centos7 ~]# yum install percona-xtrabackup
We will create a backup directory
[root@centos7 ~]# mkdir /root/backup
Installation done. To proceed with Full backup,we need to issue the innobackupex, with the DB admin user and password, and also the backup directory.
[root@centos7 ~]# innobackupex --user=root --password=PASSWORD /root/backup
To get the backup information for a particular backup, we can check the xtrabackup_checkpoints file.
[root@centos7 backup]# cat /root/backup/2015-09-29_02-01-17/xtrabackup_checkpoints
We have done the Full backup. To restore a Full backup, we have to stop the MariaDB/Mysql server first.
[root@centos7 ~]# service mysql stop
Move the current mysql data directory to somewhere.
[root@centos7 ~]# rm -fr /var/lib/mysql_old
[root@centos7 ~]# mv /var/lib/mysql/ /var/lib/mysql_old
Issue the following command to restore.
[root@centos7 ~]# innobackupex --copy-back /root/backup/2015-09-29_02-01-17/
Change back the ownership of the mysql data directory.
[root@centos7 ~]# chown mysql:mysql /var/lib/mysql -R
And lastly, start the MariaDB/Mysql service.
[root@centos7 ~]# service mysql start

Wednesday, 23 September 2015

Setup MariaDB Galera Cluster 10.0 On CentOS7

This guide looks into how to setup MariaDB Galera Cluster on CentOS7. MariaDB Galera Cluster is a synchronous multi-master cluster for MariaDB. It is is an easy-to-use, high-availability solution, which provides high system uptime, no data loss and scalability for future growth. It only supports the XtraDB/InnoDB storage engines

Features:
Synchronous replication
Active-active multi-master topology
Read and write to any cluster node
Automatic membership control, failed nodes drop from the cluster
Automatic node joining
True parallel replication, on row level
Direct client connections, native MySQL look & feel

Benefits:
The above features yield several benefits for a DBMS clustering solution, including:
No slave lag
No lost transactions
Both read and write scalability
Smaller client latencies

For this setup, we have 2 nodes.(ie 192.168.1.11,192.168.1.12.) MariaDB will first setup in (.11) and start in bootstrap mode. After (.11) has started, (.12) will setup next. Once the MariaDB service on (.12) started, Galera process will sync database data and transactions from (.11) to (.12), and after in sync, MariaDB in (.12) will turn on. Both servers will be multi masters and in sync constantly.

To begin with the setup, for simplicity, we will switch off selinux and firewall.

[root@centos7-11 ~]#systemctl stop firewalld
[root@centos7-11 ~]#systemctl disable firewalld
[root@centos7-11 ~]#vi /etc/selinux/config
disabled
[root@centos7-11 ~]#reboot
We will add a repository from MariaDB.

[root@centos7-11 ~]# vi /etc/yum.repos.d/mariadb.repo

[mariadb]
name = MariaDB
baseurl = http://yum.mariadb.org/10.0/centos6-amd64
gpgkey=https://yum.mariadb.org/RPM-GPG-KEY-MariaDB
gpgcheck=1
Install the package using YUM.
[root@centos7-11 ~]# yum clean all
[root@centos7-11 ~]# yum install MariaDB-Galera-server
Setup MariaDB.(At this point,the service is still call mysql.)
[root@centos7-11 ~]# service mysql start
[root@centos7-11 ~]# mysql_secure_installation
Stop the mysql service to adjust the MariaDB config file.
[root@centos7-11 ~]# service mysql stop
[root@centos7-11 ~]# vi /etc/my.cnf
!includedir /etc/my.cnf.d
Add replication parameters to server.cnf
[root@centos7-11 ~]# vi /etc/my.cnf.d/server.cnf 
[galera]
# Mandatory settings
wsrep_provider=/usr/lib64/galera/libgalera_smm.so
wsrep_cluster_address=gcomm://
binlog_format=row
default_storage_engine=InnoDB
innodb_autoinc_lock_mode=2
bind-address=192.168.1.11
#
# Optional setting
#wsrep_slave_threads=1
#innodb_flush_log_at_trx_commit=0
We can start the MariaDB on first node.(.11)
[root@centos7-11 ~]# service mysql start
By now, this node has setup to be the first master database. We shell proceed to setup the second master database.

Similarly, we will switch off selinux and firewall.

[root@centos7-12 ~]#systemctl stop firewalld
[root@centos7-12 ~]systemctl disable firewalld
[root@centos7-12 ~]vi /etc/selinux/config
disabled
[root@centos7-12 ~]reboot
We will add a repository from MariaDB.

[root@centos7-12 ~]# vi /etc/yum.repos.d/mariadb.repo

[mariadb]
name = MariaDB
baseurl = http://yum.mariadb.org/10.0/centos6-amd64
gpgkey=https://yum.mariadb.org/RPM-GPG-KEY-MariaDB
gpgcheck=1
Install the package using YUM.
[root@centos7-12 ~]# yum clean all
[root@centos7-12 ~]# yum install MariaDB-Galera-server
At this point, we just need to configure the MariaDB config files
[root@centos7-12 ~]# vi /etc/my.cnf
!includedir /etc/my.cnf.d
Add replication parameters to server.cnf
[root@centos7-12 ~]# vi /etc/my.cnf.d/server.cnf
[galera]
# Mandatory settings
wsrep_provider=/usr/lib64/galera/libgalera_smm.so
wsrep_cluster_address=gcomm://192.168.1.11
binlog_format=row
default_storage_engine=InnoDB
innodb_autoinc_lock_mode=2
bind-address=192.168.1.12

#
# Optional setting
#wsrep_slave_threads=1
#innodb_flush_log_at_trx_commit=0
We can start the MariaDB on second node.(.12)
[root@centos7-12 ~]# service mysql start
And thats it, 2 node multi masters MariaDB clusters.

Monday, 30 March 2015

Automatic WAN failover (Multiple WAN) using ClearOS

In this tutorial, we look into how to configure Automatic Failover of 2 WAN Network using ClearOS.

Setup:
2 Internet Links (WAN)
1 LAN Link

Note: For ClearOS, you will need to have at least 1GB of ram.

Insert the DVD rom and lets start:

Install or upgrade an existing system
Install with Basic Storage Device.
Enter your root password twice.
It will take a while to copy the system files.
After it is done, let it reboot.
Login using the root credentials setup earlier.
At install wizard,click on next,and select Gateway Mode,click next.

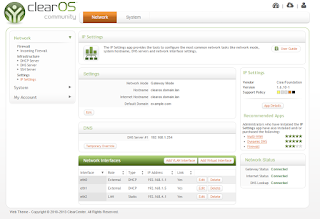
eth0: External,DHCP,isp1.domain.lan
eth1: External,DHCP,isp2.domain.lan
eth2: LAN,Static,192.168.4.1,255.255.255.0,Enable DHCP Server

DNS Servers: Next,configure your DNS.
Select Support Edition: You can choose Community Edition or Professional Edition.
Software updates: Let it update its latest software.
System Registration: If you have an account, enter the login details. If you do not have, you can create an account.

Internet domain: Enter your domain.
Hostname: Enter your hostname.
Date and Time: Sync your time
Getting Started: Click Next
App Selection: Click Next
App Review: Click Next
Down and Install: Click Next


After above setup, the LAN link will act as a gateway, routing thru active link 1 or 2.


Have a try and let me know if it works for you.

Monday, 9 March 2015

Setup HAProxy (loadbalancing) on CentOS7

This guide looks into how to setup HAProxy on CentOS7. HAProxy offers load balanced services to HTTP and TCP-based services, such as internet-connected services and web-based applications.

In Apr 2013, we looked into how to Setup Load-Balancing Cluster with LVS and Piranha on Centos 6. This time round for CentOS7, we will setup HAProxy Loadbalancing Cluster as this is shipped with CentOS7.

Setup:
1. HAProxy Server at 192.168.1.3
2. LB Virtual IP to use 192.168.1.3
3. Web1 at 192.168.1.9
4. Web2 at 192.168.1.10

For all the servers, lets (temporary) remove the firewall and selinux.
systemctl stop firewalld
systemctl disable firewalld
vi /etc/selinux/config
disabled
reboot
Lets start, login to HAProxy Server:
yum install haproxy
vi /etc/haproxy/haproxy.cfg
#---------------------------------------------------------------------
# Global settings
#---------------------------------------------------------------------
global
    # to have these messages end up in /var/log/haproxy.log you will
    # need to:
    #
    # 1) configure syslog to accept network log events.  This is done
    #    by adding the '-r' option to the SYSLOGD_OPTIONS in
    #    /etc/sysconfig/syslog
    #
    # 2) configure local2 events to go to the /var/log/haproxy.log
    #   file. A line like the following can be added to
    #   /etc/sysconfig/syslog
    #
    #    local2.*                       /var/log/haproxy.log
    #
    log         127.0.0.1 local2

    chroot      /var/lib/haproxy
    pidfile     /var/run/haproxy.pid
    maxconn     4000
    user        haproxy
    group       haproxy
    daemon

    # turn on stats unix socket
    stats socket /var/lib/haproxy/stats

#---------------------------------------------------------------------
# common defaults that all the 'listen' and 'backend' sections will
# use if not designated in their block
#---------------------------------------------------------------------
defaults
    mode                    http
    log                     global
    option                  httplog
    option                  dontlognull
    option http-server-close
    option forwardfor       except 127.0.0.0/8
    option                  redispatch
    retries                 3
    timeout http-request    10s
    timeout queue           1m
    timeout connect         10s
    timeout client          1m
    timeout server          1m
    timeout http-keep-alive 10s
    timeout check           10s
    maxconn                 3000

#---------------------------------------------------------------------
# main frontend which proxys to the backends
#---------------------------------------------------------------------
frontend LB
   bind 192.168.1.3:80
   reqadd X-Forwarded-Proto:\ http
   default_backend LB

#---------------------------------------------------------------------
# round robin balancing between the various backends
#---------------------------------------------------------------------
backend LB 192.168.1.3:80
   mode http
   stats enable
   stats hide-version
   stats uri /stats
   stats realm Haproxy\ Statistics
   stats auth admin:pass4325    # HAProxy Statistic username/password
   balance roundrobin           # Load balancing to use round-robin
   option httpchk
   option httpclose
   option forwardfor
   cookie LB insert
   server web1 192.168.1.9:80  check  # backend server.
   server web2 192.168.1.10:80 check  # backend server.
We shell enable the service and start the service:
systemctl enable haproxy
systemctl start haproxy
At Webserver create a test page.
vi /var/www/html/p.html
192.168.1.9 (To display Webserver IP address)
systemctl restart httpd
To access the statistic page, navigate to the HAProxy ip/stats,login with the username and pass as states in haproxy.cfg.

Friday, 27 February 2015

Install MongoDB with PHP on Fedora

MongoDB is an open-source database used by companies of all sizes, across all industries and for a wide variety of applications. It is an agile database that allows schemas to change quickly as applications evolve, while still providing the functionality developers expect from traditional databases, such as secondary indexes, a full query language and strict consistency.

This tutorial looks into how to install latest MongoDB with PHP on Fedora.

Create a /etc/yum.repos.d/mongodb.repo file:
vi /etc/yum.repos.d/mongodb.repo
If you are running a 64-bit system, use the following configuration:
[mongodb]
name=MongoDB Repository
baseurl=http://downloads-distro.mongodb.org/repo/redhat/os/x86_64/
gpgcheck=0
enabled=1
else for 32-bit system, use:
[mongodb]
name=MongoDB Repository
baseurl=http://downloads-distro.mongodb.org/repo/redhat/os/i686/
gpgcheck=0
enabled=1
To install the latest stable version of MongoDB, issue the following command:
yum install -y mongodb-org
Install php,mongo driver:
pecl install mongo
create a mongo (php) ini
vi /etc/php.d/mongo.ini
And include the driver:
extension=mongo.so
Enable mongod on startup
systemctl enable mongod
start mongod:
service mongod start
Open mongo client to test.
mongo
create database test:
use test
Lets do an insert:
db.collection1.insert({"name":"desc"})
And lets do an query:
db.collection1.find();
Lets proceed with using mongodb in php. Restart php-fpm:
systemctl restart php-fpm.service
We shell create a php script:
<?php
$connection = new Mongo();
$dbname = $connection->selectDB('test');
$collection = $dbname->collection1;
$arr = array(
        'name' => 'MongoDB',
        'desc' => 'MongoDB is a document database.'
);
$collection->insert($arr);
$result = $collection->find();
foreach ($result as $document) {
        echo $document["name"]."\n";
        echo $document["desc"]."\n";
}
?>
You can run above script in web server or just run:
php test_mongo.php

Tuesday, 17 February 2015

Benchmark redis 2.8.19 with memcache 1.4.22

Having read a few articles on comparing redis with memcache. I decided to benchmark myself.

My setup:
Fedora 21,Nginx 1.6.2,redis 2.8.19,memcache 1.4.22,php-fpm 5.6.4.

My Benchmark script(php)
<?php
    ################# redis ###################################################
    $k=0;
    $t_time=0;
    echo "Benchmark redis : 
"; $redis = new Redis(); $redis->connect('127.0.0.1', 6379); $original_string = 'abcdefghijklmnopqrstuvwxyz'; for ($i=0;$i<=10000;$i++){ $random_string = get_random_string($original_string, 10); $random_string2 = get_random_string($original_string, 10); $a1[$i]=$random_string; $a2[$random_string]=$random_string2; } $tstart=timer_start(); for ($i=0;$i<=10000;$i++){ $redis -> set($a1[$i],$a2[$a1[$i]]); } $t_time=timer_end($tstart); echo "Total Set time: ".$t_time."
"; for ($j=0;$j<10;$j++){ $tstart=timer_start(); for ($i=0;$i<=10000;$i++){ $value=$redis -> get($a1[$i]); } $t_time=timer_end($tstart); echo "Loop $j (Get) time: ".$t_time."
"; $k=$k+$t_time; } echo "Total 10 loop Get time $k
"; ################# memcache ################################################### $k=0; $t_time=0; echo "
Benchmark memcache :
"; $memcache = new Memcache; $memcache->connect('127.0.0.1', 11211) or die ("Cannot connect"); $original_string = 'abcdefghijklmnopqrstuvwxyz'; for ($i=0;$i<=10000;$i++){ $random_string = get_random_string($original_string, 10); $random_string2 = get_random_string($original_string, 10); $a1[$i]=$random_string; $a2[$random_string]=$random_string2; } $tstart=timer_start(); for ($i=0;$i<=10000;$i++){ $memcache->set($a1[$i], $a2[$a1[$i]], false, 20) or die ("Cannot save data"); } $t_time=timer_end($tstart); echo "Total Set time: ".$t_time."
"; for ($j=0;$j<10;$j++){ $tstart=timer_start(); for ($i=0;$i<=10000;$i++){ $value = $memcache->get($a1[$i]); } $t_time=timer_end($tstart); echo "Loop $j (Get) time: ".$t_time."
"; $k=$k+$t_time; } echo "Total 10 loop Get time $k
"; function timer_start() { $time = microtime(); $time = explode(" ", $time); $time = $time[1] + $time[0]; return $time; } function timer_end($start) { $time = microtime(); $time = explode(" ", $time); $time = $time[1] + $time[0]; return $time-$start; } function get_random_string($valid_chars, $length) { $random_string = ""; $num_valid_chars = strlen($valid_chars); for ($i = 0; $i < $length; $i++) { $random_pick = mt_rand(1, $num_valid_chars); $random_char = $valid_chars[$random_pick-1]; $random_string .= $random_char; } return $random_string; } ?>
Benchmark redis : 
Total Set time: 0.12764096260071
Loop 0 (Get) time: 0.175616979599
Loop 1 (Get) time: 0.18264698982239
Loop 2 (Get) time: 0.13450312614441
Loop 3 (Get) time: 0.1352870464325
Loop 4 (Get) time: 0.13448214530945
Loop 5 (Get) time: 0.13312005996704
Loop 6 (Get) time: 0.15526604652405
Loop 7 (Get) time: 0.40630602836609
Loop 8 (Get) time: 0.13408994674683
Loop 9 (Get) time: 0.13564801216125
Total 10 loop Get time 1.726966381073 

Benchmark memcache : 
Total Set time: 0.14455795288086
Loop 0 (Get) time: 0.12623596191406
Loop 1 (Get) time: 0.13038897514343
Loop 2 (Get) time: 0.1564610004425
Loop 3 (Get) time: 0.11394095420837
Loop 4 (Get) time: 0.11402487754822
Loop 5 (Get) time: 0.11300802230835
Loop 6 (Get) time: 0.11119389533997
Loop 7 (Get) time: 0.1115710735321
Loop 8 (Get) time: 0.11155104637146
Loop 9 (Get) time: 0.19941091537476
Total 10 loop Get time 1.28778672218322
The results shows for simple Set and Get, redis is faster. For SET, redis is faster by 12% For GET, memcache is faster by 25%

For other functions,more extensive tests/benchmarks have to perform on both.

search iomeweekly