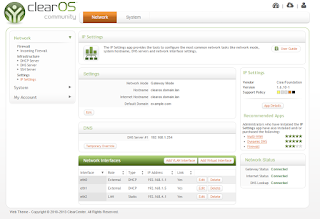
 After above setup, the LAN link will act as a gateway, routing thru active link 1 or 2.
 Have a try and let me know if it works for you.
A Linux blog by ioMeWeekly, includes tutorials, news, help, programming, tips and how-to guides for opensource applications.
 After above setup, the LAN link will act as a gateway, routing thru active link 1 or 2.
 Have a try and let me know if it works for you.
systemctl stop firewalld
systemctl disable firewalld
vi /etc/selinux/config
disabled
rebootLets start, login to HAProxy Server:
yum install haproxy
vi /etc/haproxy/haproxy.cfg
#---------------------------------------------------------------------
# Global settings
#---------------------------------------------------------------------
global
    # to have these messages end up in /var/log/haproxy.log you will
    # need to:
    #
    # 1) configure syslog to accept network log events.  This is done
    #    by adding the '-r' option to the SYSLOGD_OPTIONS in
    #    /etc/sysconfig/syslog
    #
    # 2) configure local2 events to go to the /var/log/haproxy.log
    #   file. A line like the following can be added to
    #   /etc/sysconfig/syslog
    #
    #    local2.*                       /var/log/haproxy.log
    #
    log         127.0.0.1 local2

    chroot      /var/lib/haproxy
    pidfile     /var/run/haproxy.pid
    maxconn     4000
    user        haproxy
    group       haproxy
    daemon

    # turn on stats unix socket
    stats socket /var/lib/haproxy/stats

#---------------------------------------------------------------------
# common defaults that all the 'listen' and 'backend' sections will
# use if not designated in their block
#---------------------------------------------------------------------
defaults
    mode                    http
    log                     global
    option                  httplog
    option                  dontlognull
    option http-server-close
    option forwardfor       except 127.0.0.0/8
    option                  redispatch
    retries                 3
    timeout http-request    10s
    timeout queue           1m
    timeout connect         10s
    timeout client          1m
    timeout server          1m
    timeout http-keep-alive 10s
    timeout check           10s
    maxconn                 3000

#---------------------------------------------------------------------
# main frontend which proxys to the backends
#---------------------------------------------------------------------
frontend LB
   bind 192.168.1.3:80
   reqadd X-Forwarded-Proto:\ http
   default_backend LB

#---------------------------------------------------------------------
# round robin balancing between the various backends
#---------------------------------------------------------------------
backend LB 192.168.1.3:80
   mode http
   stats enable
   stats hide-version
   stats uri /stats
   stats realm Haproxy\ Statistics
   stats auth admin:pass4325    # HAProxy Statistic username/password
   balance roundrobin           # Load balancing to use round-robin
   option httpchk
   option httpclose
   option forwardfor
   cookie LB insert
   server web1 192.168.1.9:80  check  # backend server.
   server web2 192.168.1.10:80 check  # backend server.
We shell enable the service and start the service:
systemctl enable haproxy
systemctl start haproxy
At Webserver create a test page.
vi /var/www/html/p.html
192.168.1.9 (To display Webserver IP address)
systemctl restart httpdTo access the statistic page, navigate to the HAProxy ip/stats,login with the username and pass as states in haproxy.cfg.